I know you are just dying to see my new countertops. I am painting, painting, painting my little heart out and should have pictures of the finished product in a couple days. Today I was thinking I would tell you some of the products that I use and some of the steps that I took to paint the cabinets.
1. WASH
I used oxiclean this time. I had a hard time finding TSP for some reason. Plus with 3 kids it's not like I can drive all over town looking for it. So I just used what I had on hand that would be a
good degreaser. You can follow the directions for whatever soap you use. Sometime you need to wipe them again to wipe off any soap residue, sometimes you don't.
2. SAND
Either use sandpaper or liquid sand. I use one or the other or both. Areas that would be hard to sand (round edges, etc) get
liquid sand. How much do you need to sand? Let me put it this way: Shiny surfaces don't take paint well. So you have to rough them up. If you are painting, you don't need to sand off all the finish. Just rough up the surface. Small vibrating sanders are not expensive and you will use is many times. It's worth the 25 or 30 bucks. (Wipe off the dust with tackcloth (LOVE) or a damp cloth (or babywipes).
3. FILL
I filled any holes that I needed to in order to change the hardware. I have used wood filler, wood putty, spackle, caulk....just about anything. What is the best? For me, spackle looked the best in the end. Purists would probably roll in their grave, but whatever. You gotta do what you gotta do. I used caulk in the cabinet cracks.

Label doors and drawers so they get put back in the right place.

4. PRIME
I used
Zinsser oil-based primer/sealer. It smells and you need mineral spirits to clean up. But it adheres well and holds up well. It can be recoated in 1 hour! When I managed apartments, the painters always wanted Zinsser when we were painting old brown cabinets white. They didn't even bother to sand the cabinets. So in a pinch you could skip the sanding, but make sure the cabinets are very clean. Then prime. If you don't want to use oil-based primer, I recommend Kilz2 latex primer. Also great. Also can be gritty and you will want to sand between coats.
I usually do 2 thin coats of primer.


** Here is a tip. Lately, I have been
using old plastic sacks as disposable paint tray covers. When I am done, I just pull the sacks off and throw them away! I also
wrap my brushes and rollers with baggies or plastic wrap between coats. Even overnight. That way I don't have to clean the brushes as much. Only when I am done with them.
5. SAND. AGAIN.
I sand between coats. Sometimes the primer can leave a gritty residue. If you want a nice, smooth finish, sand again.
I use brown paper sacks as sandpaper at this stage. They are about the same as fine sandpaper, free, and easily acquired. Just tear off a piece and go to town. Just a quick rub or two over all the surfaces will do. (Wipe off dust)
I USE 2 COATS OF PRIMER AND AT LEAST 2 COATS OF TOPCOAT. I sanded between primer coats and not really at all between topcoats since it dries smoother.
6. TOPCOAT
I use the same paint and color that I use on my doors and trim. It is from Sherwin Williams and it is a
latex ENAMEL for doors and trim in semi-gloss. Proclassic? My label is covered in paint so I can't read it! My understanding is that enamel paint "dries" or rather, cures, to a nice hard finish. I say it's true. Sometimes regular latex paint can remain tacky or soft feeling. Enamel is great. You can paint latex over oil. But I am told that you should not paint oil over latex. I don't know why.
I usually do 2-3 coats of topcoat.
Here are some other procedural things I do. I have some paper cups that I use to prop the doors up. I paint the back side, wait for it to dry enough that I can flip it over and paint the other side. That way, the bottom can continue to finish drying while I start on the other side. The cups also keep it up off the surface that I am painting on so the edges don't stick. I have heard of using push pins also. I couldn't stick them into my doors. I'm weak I guess.
I think that is it for now.

 After:
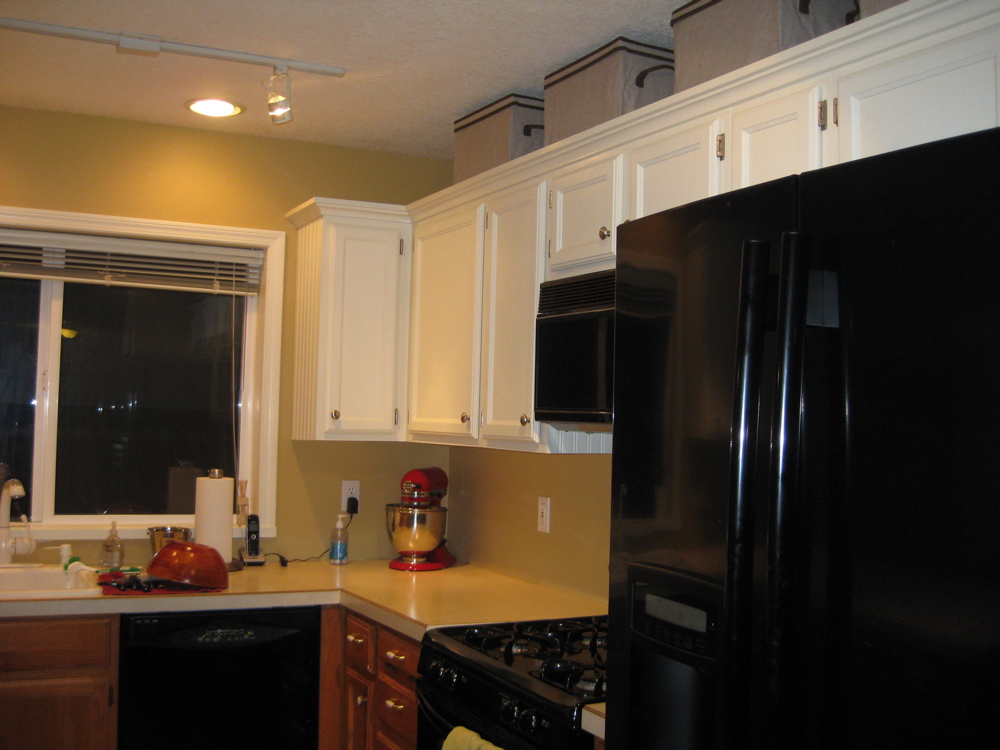
 Before:
 After:

 Notice the false front drawers under the old sink. While I was at it, I turned them into tilt-out drawers and added cup pulls to them too. So much more useful!


 I still need to finish the side and back of the peninsula. That is a post for next week. Then they will be 100% done! I am super happy. The room is SOOOO much brighter, cleaner, and sparkly.