So after securing the beadboard to the sides, I primed the cabinet fronts. I use Zinnser oil-based primer. I think it has better adhesion and holds up better. Just my opinion. I rolled and brushed. I have a sprayer I just usually spend more time trying to get it work then it would take to just roll and brush the dang stuff.


Hard to see in this picture, but notice the sides of the cabinet peeking out under the microwave. Luckily there was enough room that I could shove some beadboard there too. I just cut about 4 inches worth and liquid nailed it on there as well. A close up photo will show it a little later.

I had trouble getting some of the beadboard to lay flat. So I ended up nailing and clamping and whatever else I could do to get it work.

I primed and painted the doors. I ended up using liquid sand rather than actually sanding them. Just did. Can't explain it. Probably always better to sand than use the liquid sand. Just do what you have to do. I was faster for me to do the liquid sand.

I ended up doing 2 coats over the primer. I used Door and Trim latex enamel in semi-gloss from Sherwin Williams. It is what I had made to match my existing trim. Why not use it on the cabinets too? It is an antique white.

I am not sure what I am showing in this picture. Maybe it is the caulk. I caulked where the beadboard met the front of the cabinet. I wasn't trying to fill the crack to invisibility. Just so it looked like it was supposed to be there. Caulk makes everything look more finished. Make sure it is PAINTABLE caulk.

I also caulked the cabinet door fronts. As I painted I realized that the cracks were very evident. Love caulk. I keep a damp rag around and use my finger to smooth the caulk. Then I wipe my finger on the rag as needed. Sometimes I just take the rag and wipe it down the caulk line to so as to clean it up a bit. Or start over. But that never happens.

Here is a close up of under the microwave. I am so glad I did that. Makes it look like it was all intentional. And I didn't have to take the microwave down. Bonus.

This is a shot of everything getting the final coats. Let me remind you that I was focusing on the uppers to make sure they were done before the granite comes. I haven't gotten to the lowers yet.


This is where I started trying out paint colors for the walls. The green was here when we moved in 3 years ago. We didn't hate it so we left it. In the 3 years we have been in the house we have painted every room except this one. So this is really finally putting our stamp on the house and erasing all the evidence of the previous owner.
Oh! And here is one of the doors on with the new hardware. Note on hardware: I tried repainting the hinges and I didn't like it. When the hinges did their thing, they rubbed the paint off. I got all my hardware from ebay. You will find better prices there than at Orange or Blue. Really. Even with shipping. And they are not USED. Some people think everything on ebay is used. It isn't.

I wanted a warm color. Beige I guess but warm. Golden. But not yellow.

I tried it all over the kitchen to see how they would look in different light.

My husband of course liked the darkest choice. My daughter walked in and said, "Oh! I like the purple!" And we realized the darkest brown did look purple. So it was out. I started with 4 samples.


I intend to tile a backsplash, but until then it will have paint too so I tried it out under the cabinets where it is a little shadowy.

Then I went back and got 2 more samples. And then I mixed some together and tried that.

So I finally went to the store and talked to the dude and told him why I was having such a hard time and he helped me pick out one more. I was not willing to buy any more samples so I decided I would go with what he and I chose together.....I will keep you in suspense until my next posting! (insert evil laugh)


 During: I decided how big the trim rectangles would be and pre-cut them out in the garage. When I came inside, all I had to do was tape them up and then nail them in place with my nail gun. Notice: I had beat up the top part of the cabinet when I was getting the old countertops out. So I used some trim to cover that as well.


 Here is the trim I used to cover my mistakes.
 Filled the nail holes...
 Primed (2 coats):
 And painted 2 coats. Here is the finished product complete with new hardware on the far cabinet and drawer.


 I am really happy with it! The next post will be before and afters of the kitchen. I still need to get a backsplash going but that is for another day......in like 2 months. I need to recover!


 And then today I did this:


 I beat up the base cabinets a little. At least they were kinda crappy to begin with. Plus, my painting plans include some new trim that will cover any of that anyway. So it's all good, little chickens. I started with my little jigsaw but this job was too much for it. So I called in the big guns and borrowed a sawzall. Holy moley. I know what I want next. Hee hee.

 Hard to see in this picture, but notice the sides of the cabinet peeking out under the microwave. Luckily there was enough room that I could shove some beadboard there too. I just cut about 4 inches worth and liquid nailed it on there as well. A close up photo will show it a little later.
 I had trouble getting some of the beadboard to lay flat. So I ended up nailing and clamping and whatever else I could do to get it work.
 I primed and painted the doors. I ended up using liquid sand rather than actually sanding them. Just did. Can't explain it. Probably always better to sand than use the liquid sand. Just do what you have to do. I was faster for me to do the liquid sand.
 I ended up doing 2 coats over the primer. I used Door and Trim latex enamel in semi-gloss from Sherwin Williams. It is what I had made to match my existing trim. Why not use it on the cabinets too? It is an antique white.
 I am not sure what I am showing in this picture. Maybe it is the caulk. I caulked where the beadboard met the front of the cabinet. I wasn't trying to fill the crack to invisibility. Just so it looked like it was supposed to be there. Caulk makes everything look more finished. Make sure it is PAINTABLE caulk.
 I also caulked the cabinet door fronts. As I painted I realized that the cracks were very evident. Love caulk. I keep a damp rag around and use my finger to smooth the caulk. Then I wipe my finger on the rag as needed. Sometimes I just take the rag and wipe it down the caulk line to so as to clean it up a bit. Or start over. But that never happens.
 Here is a close up of under the microwave. I am so glad I did that. Makes it look like it was all intentional. And I didn't have to take the microwave down. Bonus.
 This is a shot of everything getting the final coats. Let me remind you that I was focusing on the uppers to make sure they were done before the granite comes. I haven't gotten to the lowers yet.


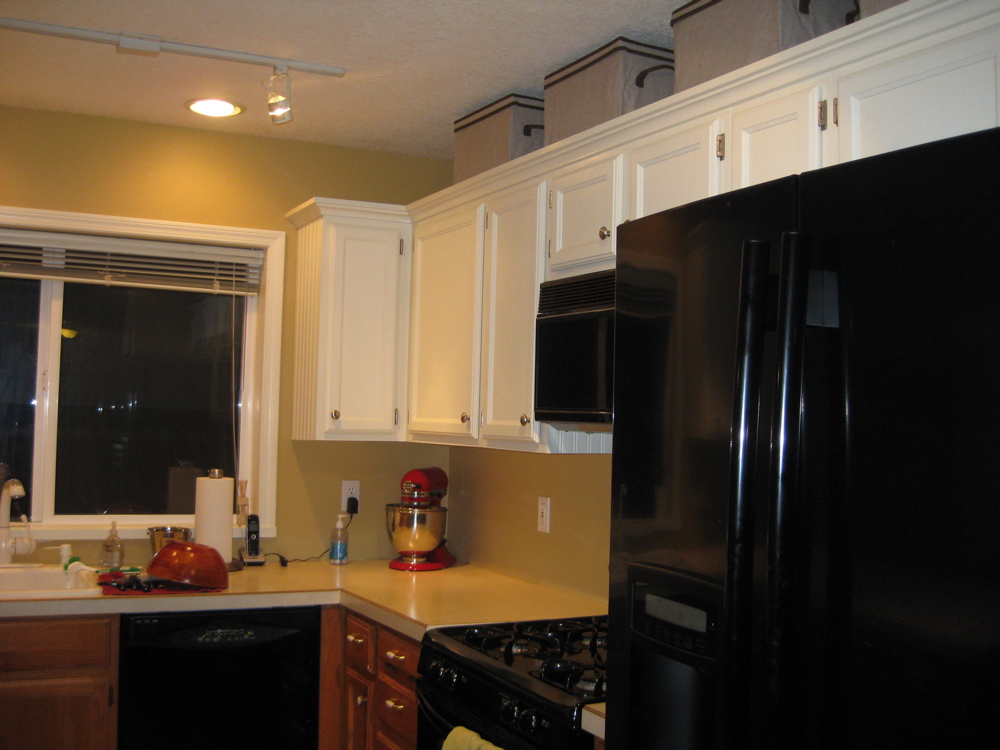
 This is where I started trying out paint colors for the walls. The green was here when we moved in 3 years ago. We didn't hate it so we left it. In the 3 years we have been in the house we have painted every room except this one. So this is really finally putting our stamp on the house and erasing all the evidence of the previous owner.
 I wanted a warm color. Beige I guess but warm. Golden. But not yellow.
 I tried it all over the kitchen to see how they would look in different light.
 My husband of course liked the darkest choice. My daughter walked in and said, "Oh! I like the purple!" And we realized the darkest brown did look purple. So it was out. I started with 4 samples.

 I intend to tile a backsplash, but until then it will have paint too so I tried it out under the cabinets where it is a little shadowy.
 Then I went back and got 2 more samples. And then I mixed some together and tried that.
 So I finally went to the store and talked to the dude and told him why I was having such a hard time and he helped me pick out one more. I was not willing to buy any more samples so I decided I would go with what he and I chose together.....I will keep you in suspense until my next posting! (insert evil laugh)