Showing posts with label gray and white. Show all posts

Monday, August 29, 2011

Farmhouse Bed with new pillows


Here are just some updated photos. I ordered some fabric from fabric.com and made a couple pillows. I didn't have pillow forms so I just took an extra standard size pillow and cut it in half. They aren't exactly the same size and it drives me a little nuts. OCD, anyone?

And I hung my piece of art I made...oh....last year I guess. I got the duvet cover at Goodwill for like $7.99 about 6 months ago. Score. I knew then that I was going to head in a yellow/gray/white direction in the master bedroom so I picked it up.


wainscoting board and batten
board and batten wainscoting
I need to do something about the ceiling fan and I have to figure out how to make our other furniture look decent. But until then, I am happy with the new look!

Thursday, August 18, 2011

Master Bedroom Farmhouse Bed

Last we met I was finishing up the wainscoting. I had no camera to document the progress until now. The wainscoting is done and you will see it in later photos.

While I was working on that I decided to repaint as well. And with all that work I had to move my bed around and such. Well, it is a piece of garbage. It is just a metal frame, no headboard, nothing. And it was propped up on blocks because it was too low to store anything under the bed. And then I realized one of the wheels was busted. I got so ticked that I was having to deal with that piece of junk that I decided I was going to get us a new bed. Well.....make us one.

Enter the Farmhouse Bed from Ana White/Knock-off Wood. I had my sights set on it for a while but finally bit the bullet. The camera was gone for much of that as well, but here are some photos from when hubs returned home.

This is the footboard getting a paint job.
Here is the footboard and a glimpse of the headboard too. I used "rattle can" primer (gray) and then satin black for the top coat (also in spray cans). I also did a couple coats of polycrylic at the last minute. Good thing too 'cause my kids are already climbing all over that thing!
This is with the primer. Headboard.
This is one of the sideboards as it came from the store.
Lots of sanding later.
Setting it up in the room. (See the wainscoting and new gray wall paint?)


Supermodel baby.


That thing is so sturdy. It is unbelievable. It turns out my kids can now get up on my bed with ease by using the footboard as a ladder. Great. As soon as I make my bed they have to climb up on it and jump all over it. Oh well.
The lumber cost about $115. I used the following tools: miter saw, nail gun, palm sander, drill (duh), and at the end I bought a Kreg Jig Jr. ($35) to put the side rails on. I had a lot of paint and poly on hand but I had to buy some extra so I probably spent $25 or so on spray paint.


Saturday, August 13, 2011

Master Bedroom Wainscoting

I am prego, y'all. This is one way that my nesting manifests itself.

I had been itching to make a change in our master bedroom. These "before" photos are kind of old but basically show what the room looked like before I started. Different things were hung on the wall and I changed the bedding a bit but you get the idea.


Here is the wall in question. It is the one behind the bed.
In the bathroom redo I used luaun for the wall but this time I couldn't find any at Orange. Even the guy helping me couldn't find it. So I used something new this time. It is 1/8 inch hardboard. One side is smooth, the other rough. I measured where the outlet cutouts needed to be. I personally think this was the hardest part to get right. I measured where the rectangle would be, drew the rectangle, drilled a hole in each corner of said rectangle and then used my jigsaw to cut it out.

I used liquid nails for paneling to hang it. Plus brad nails at stud locations.

Make sure and dry fit before you start slathering glue everywhere.

I used two full sheets (4x8) and then I needed a little strip at the end.


Next I added the top and bottom trim pieces. They are MDF 1x3's. And they are sitting on the hardboard so they are flush with the top and bottom of the sheet.


I used blue tape to figure out how to space my battens. I started with the one that would cover where the 2 large sheets come together and from there went every 14 inches. I made adjustments if it came too close to an outlet. So they are anywhere from 14-15 inches apart.

You really have to measure for each batten separately, to account for slight variances in height. Trust me on this one.

I added an MDF "sashbead" to the top, nailing from the top town into the trim piece.
Here is where we will stop for the day. My hubs took the camera on a week-long backpacking trip. (For some reason he thinks amazing mountain views you only see once or twice in a lifetime is more important than documenting my room redo.) Anyway, from here I caulked all the joints and/or spackled and sanded where needed. Then I primed (2 coats) and painted (2 coats). More to come. Stay tuned!


Wednesday, June 1, 2011

Emma's Room

My little sister (age 17) decided she wanted to redecorate her room. She enlisted my help.
This is the before. By the way, I painted those walls many years ago when she was sharing a room with her sister and they had super cute bedding that coordinated perfectly. But it wasn't working anymore. She had long outgrown the butterfly theme.


She was inspired by a gym bag she has that is zebra striped with lime green trim. So that was our jumping off point. We painted the walls gray and came up with some organizational ideas for some of her things.

On the left is a huge magnet board I made for her. She has a lot of stuff to hang up. Most 17 year old girls do. You know, posters, notes, awards, photos, on and on. On the right is her little desk and some jewelry hangers I came up with.


gray bedroom We weren't able to get around to making a headboard like we wanted so I created the sunburst mirror to serve as a focal point above her bed. The scale is a little large but it's fine. She plans to add in some peacock feathers she has. That will look great.
zebra We got new bedding and one or two other new accessories.

She wanted a way to display her lacrosse socks so we devised the green frame on the right of the lower photo.
It is just an old frame painted green with eyelet screws arranged on the sides. We strung some twine and voila! I thought we would hang them with clothespins but it turned out she could hang them right between the string. Handy!
Here is a close-up view of one of the jewelry hangers after we got to hanging it all up. There are hooks screwed into the frame as well as s-hooks hanging from the wire mesh to hang necklaces anyway she wants.
Many of the earrings can hang right on the metal mesh. Everything else is hung on hooks we added.
UPDATE: The metal sheets weren't sticking that great with the adhesive alone. So I ended up putting screws in the corners and other places I thought it needed them.

The luaun is only 1/4 inch thick and I had trouble finding screws that wouldn't go all the way through it. So I actually used a washer and then a decorative washer and then the shortest screw I could find at orange. I am sorry I don't have the length for you. Anyway, I think it looks way better with the screws anyway. It looks more finished.

Tuesday, December 7, 2010

Kid's Bath Vanity

This is our kid's bathroom which doubles as the guest bathroom as well. This is how the bathroom looked when we came to look at the house. Notice: pinkish walls, horrible medicine cabinet (the oak handles in the middle totally block your face from looking in the mirror), and oak backsplash.

We have not yet changed the countertop or flooring. That is for a later date. However, I know we can improve on the rest!

First, I painted it blue. I don't know why. I just did. Probably because we already had the shower curtain and such. Notice: hollywood light fixture, and the fact that I refused to put the medicine cabinet back up after it came down. We lived for quite a while with no mirror.

Recently, we decided to repaint. Mostly because I found this shower curtain for a steal and had some gray paint left over from the playhouse project. Plus I really wanted to try to build some wainscoting on the long wall. That was super fun and easy!
Next, I wanted to paint the vanity. I hate all the builder grade oak in my house. This was going to be great practice for when I want to paint the kitchen cabinets! I removed all the doors and drawer fronts.

Here is a "before" side view. Notice: crappy sticker-type veneer. What is up with that? Also notice the oak and brass toilet paper holder.

I removed the TP holder and baseboard...

...and cut some beadboard to fit. I threw it up with some liquid nails.

I sanded the doors and drawer fronts. I didn't not completely sand off the finish. I used my vibrating sander and just roughed up the surfaces.

I filled the old hardware holes with wood filler...

...and sanded the cabinet face frame.

Here is the primed face.

Primed door fronts.

At some point I decided to try distressing the edges and decided I liked the look.

I also painted the register. Brown would simply not do. You can buy new ones too but since I had the paint I decided to skip a trip to the store. Primed with metal primer and finish coated with heirloom white spray paint.

I decided on the fly to paint the oak backsplash too. No point in leaving that alone.

I put the drawer fronts back on. I have since decided I don't like the look of the distressing ON THE CABINET FACE. I will leave it on the drawers and doors but I think it just looks dirty otherwise.

I had ordered hardward online (ebay is a great place to find hardware for much cheaper than blue or orange) and had to wait for it to come. I had tried to paint my existing hinges but it didn't work out. As the hinges opened and closed, they rubbed the paint off. So I ordered those online too.
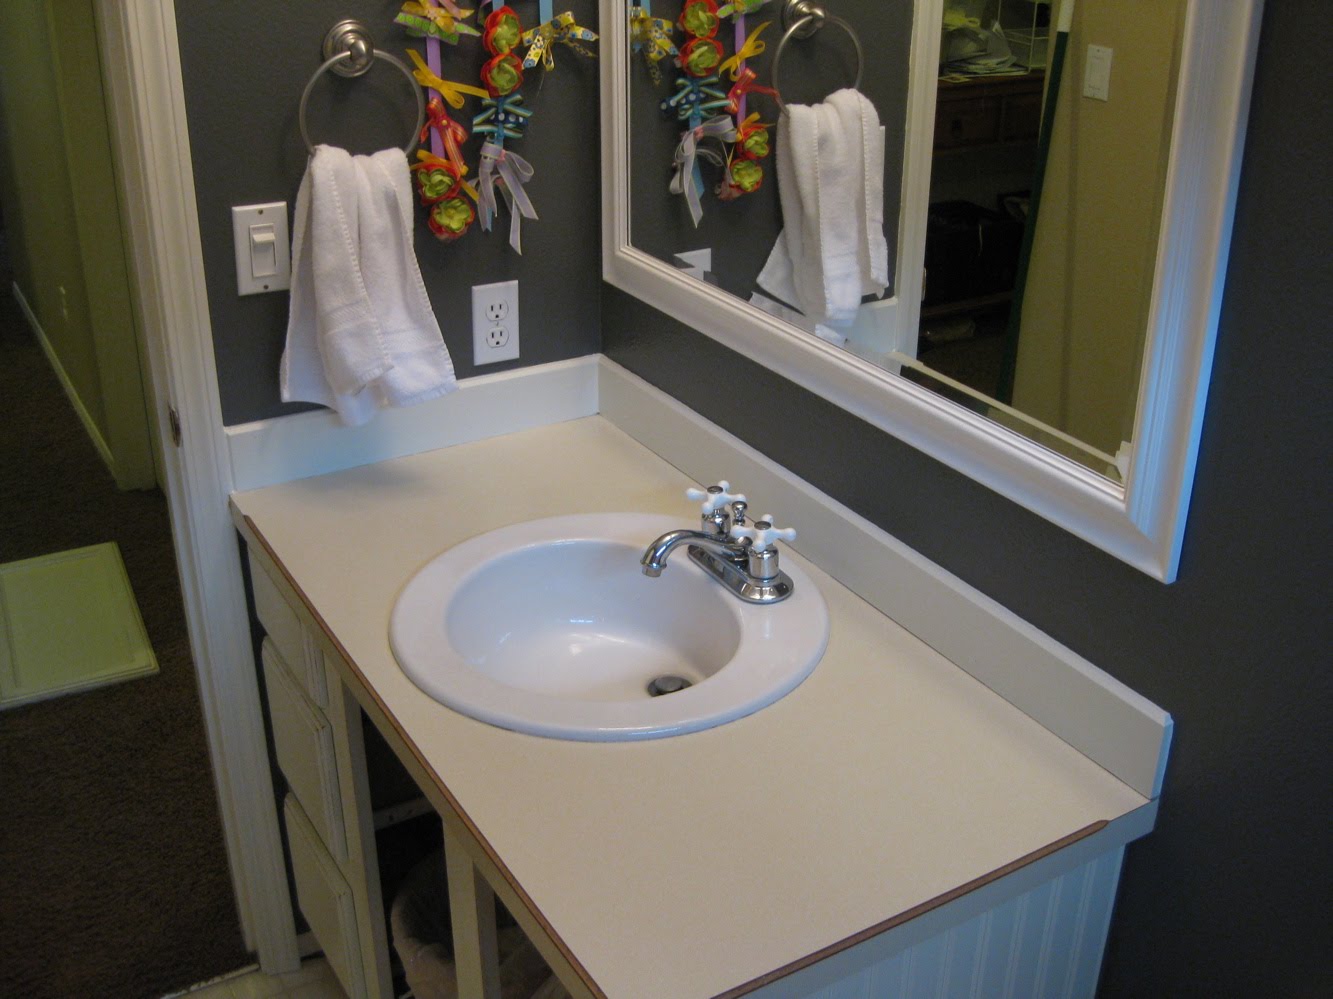
Here is a side view after I got the beadboard painted and got a new TP holder. I think the oil rubbed bronze (or black) would look much better but I had already started replacing the brass with brushed nickel shortly after we bought the house so I am going with it. If I could do it over, I would do oil-rubbed bronze.

Here are the photos of the finished product! Well, finished for now. I will be touching up the face of the base cabinet since I don't like the distressing on it. Also on the horizon: tile the floor and backsplash (I have never done this and can't wait to try!) and finding some cheap granite for the counter...Once I do that, it will take the bathroom to a whole new level! Any tips on getting a deal on granite???

Here is the white that I use. I had it color matched to my existing doors and trim. It is like an heirloom white. I use door and trim enamel from Sherwin Williams.
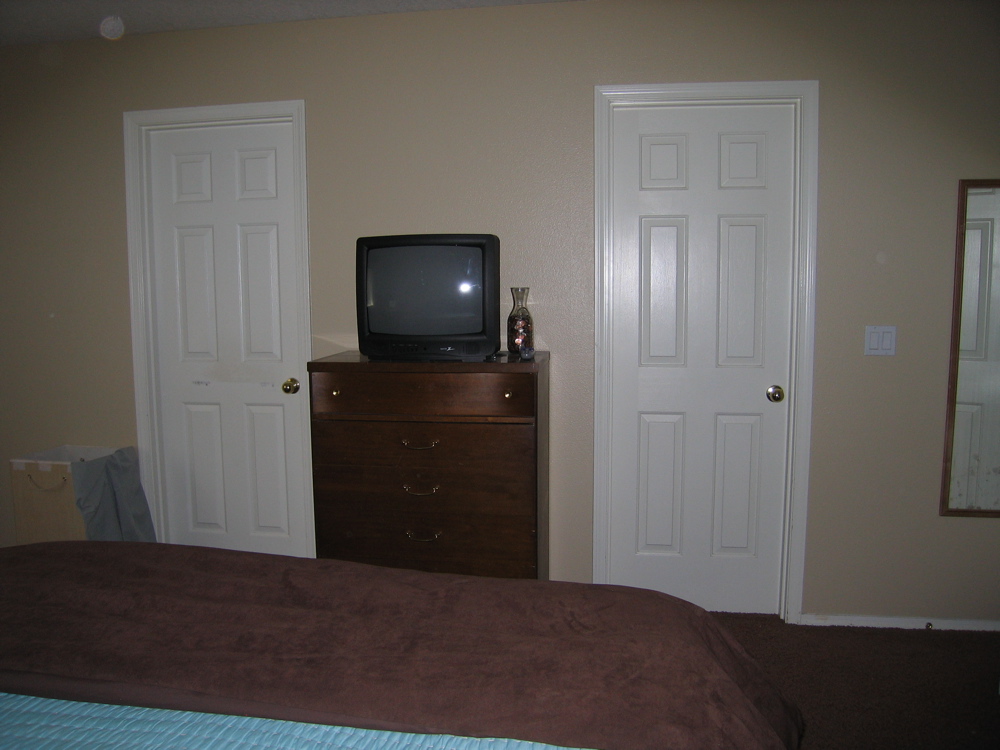