Possible titles for this post: Hodgepodge wainscoting, free wainscoting (which my husband corrected me and said it was actually not free, but prepaid), Prepaid wainscoting, and I don't want to have to load up the kids and go to the hardware store wainscoting. There is also, "Let go of perfection!" Finally I settled on ghetto wainscoting, even though it doesn't look ghetto at all in the end.
This is the wall opposite our washer and dryer. It had some oak peg hooks where you see the blank spots. I wanted to put up something a little special, so of course I turned to wainscoting because I am addicted to it. I decided I would try to use what I had. My hubs loves that.
I had some leftover stuff which I think is called hardboard. I believe it was one 4x8 sheet. It almost filled the space. We liquid-nailed it to the wall and nailed it to hold it while it dried.
There was this pesky little space on one side. We had some other material that was the same thickness (luaun) and cut a piece to fit.
But it turned out it wasn't the same thickness and stuck out a bit from the hardboard.
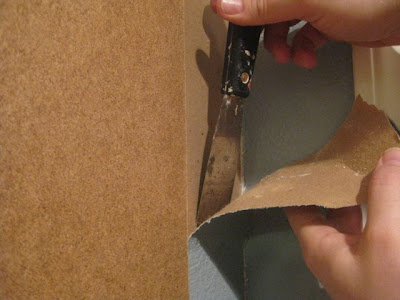
So I decided to cut out some of the paper off the drywall. That would give me the few millimeters I needed. I scored it with a utility knife several times.
And then peeled back the paper.
We stuck the luaun back on and while it wasn't perfect, It was darn close enough. We decided we could hide the rest of the imperfection with how we placed the trim.
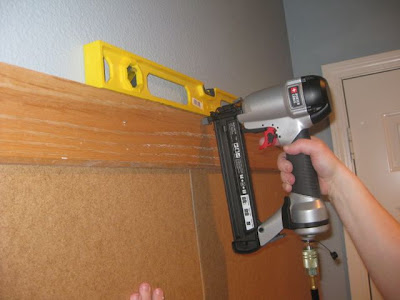
I had a leftover piece of 1x4 mdf trim so we glued and nailed that sucker up there.
For the top, I found an old piece of oak that was formerly a bathroom backsplash. So glad I kept that darn thing!
I thought I might have to run to the store to get some sashbead trim for the top but then I found several pieces of 1/2 mdf trim. I had enough to do the whole top. I think it took 5 pieces.
We cut them all with mitered angles rather than butt joints so they would fit nice and snug.
I had some pine boards that were 1x4's that we used the table saw to cut into stiles. They ended up being about the size of a 1x2. They made up the top stiles.
Here is a shot of the hodgepodge materials....mdf, oak, pine, and hardboard.
Close up. The oak had a bevel at the bottom and if I could do it over, I might cut a little off the corner of those stiles to ease the transition to the beveled edge of the oak. But whatever. It's fine and no one will be the wiser.
What to do for the lower stiles? We had enough of the 1x4's turned into 1x2's to do it but we would have to piece them together. So we cut the ends at a 45 degree angle and pieced them.
Here is what it looked like. I cleaned up these joints with spackle and such. Oh...and I should have sanded those before I nailed them up. I ended up sanding them after they were up which was a little bit of a pain. So don't make the same mistake.
I put the wood pegs back up that were originally on the wall. Trying to be resourceful again, you know....
Then I spackled and caulked to my heart's content.
And then primed the whole thing. I used Kilz2 latex primer. I should have used oil on the oak because there was some residual finish on it and it didn't take the primer great. But after a few coats it was working out.
And then we decided that we hated the hooks and took them off. U-turns are allowed.
Primed over the blank spots.
And gave it a few topcoats.
Painted the walls (Basketry by Behr), and actually BOUGHT hooks at orange. That was the only thing I bought. But I am glad. We just weren't diggin' the pegs.
Classier, no? By the way, for the bottom piece of trim I used about 5 pieces of 1x4 mdf trim that I scrounged up in my garage. I barely had enough. I had to cut a tiny half inch piece to fill in the end closest to the garage door. I didn't take any pictures of that. Sorry. But we did it!


yET ANOTHER POST I HOPE DUSTIN DOES NOT SEE! IT IS BEAUTIFUL! GREAT JOB AMBER! I'M NOT YELLING I AM JUST TOO LAZY TO TURN OF MY CAPS!!!
ReplyDelete